Crossing Ridges Saddles and Spurs
Today was a mild southerly of around 10kts but with a 2000ft wind of 30kts.
During taxi out to line up I noticed that the left brake was feeling “spongey” My FI checked it too and stated that we would need to monitor if this got worse.
We took off from RWY16@NZPP when my FI pulled the throttle and stated “your engine just quit”. I immediately pulled the throttle to idle, set the plane’s attitude to 70kts and set track towards the beach for an emergency landing. Happy with my actions, my FI then said, “ok, simulation over”. I then set full power, cleaned up the aircraft, and recommenced climbing and tracking towards Otaki Forks.
On arrival at Otaki Forks area, my FI selected a nice ridgeline to practice my first crossing procedure.
The basic procedure to crossing saddles ridges saddles and spurs is:
Approach in straight and level flight at a 45 degree angle ideally from the left for pilot visibility depending on the wind direction
Use of parallax to assess sink and safe height to cross (i.e. more terrain visible behind as approaching saddle therefore higher than saddle; less terrain visible therefore lower and turn away early, including assessment of 500’ clearance technique
Keep in mind an escape route (eg down the valley so that even in strong turbulence, the ground will fall away from you)
When actually crossing the saddle ridge or spur, fly straight across it so that it is the shortest flying distance
Once across the saddle, ridge or spur, reassess this next valley for similar obstacles and escape routes.
If requiring more height DO NOT attempt to just climb, turn via your escape route, gain height ( eg +1000ft ) and then return to the saddle, ridge or spur and retry procedure.
More details can be obtained at https://www.aviation.govt.nz/licensing-and-certification/pilots/flight-training/flight-instructor-guide/terrain-and-weather-awareness/
Whiteboard can be seen at https://www.aviation.govt.nz/assets/licensing-and-certification/Flight-instructor-guide/fig-whiteboard-am-twa.pdf
Mountain Flying Training Standards Guide https://www.aviation.govt.nz/assets/publications/flight-test-standards-guides/mountain-flying-training-standards-guide.pdf
I flew this procedure at various heights and at various speeds to appreciate the parallax effect and to also notice just how fast things can occur. I decided that the bad weather configuration of 70kts and 20 degrees of flap was the ideal set up down low so that I could stay ahead of the aircraft and keep well in control.
This training enhances and tightens everything that I have learnt to date; and its a heap of fun too!
Trusting your instruments along with your visual queues is essential in maintaining that “no visible horizon” technique so that the turns stay nice and level.
Before I knew it, it was time to fly out of the valley and back into the wide training area, descend to 1000ft, and head back down the coast to NZPP.
We decided that a touch an go was the order of the day as last flight my approach was a little fast and I floated down the runway a bit as a result. First landing I was rather high but I decided to cut the power and drop down to the correct approach angle if I could. I managed to do this and actually did a rather nice landing in the end. Powering up and setting the flaps back to 10 degrees I took off to do another circuit, and do a full stop landing.
I concentrated hard on doing all the procedures of the circuit as well as I could:
- Climb out at 75kts with aircraft trimmed
- Flaps up at 200 feet and retrim
- At 500 feet commence climbing turn into crosswind
- At 1000ft level turn onto downwind. Get level attitude, reduce power to 2300rpm, and trim
- Once stable at 1000 feet complete downwind checks
- At 4 O’clock to the threshold, reduce power to 1800, 10 degrees of flap
- Once slowed to 85 knots descending right turn onto base reducing speed and power to obtain 75kts, 20degrees of flap
- At 500 feet descending right turn onto final, reducing speed and power to obtain 65kts, full degrees of flap
- Over threshold, reduce power
- Over aiming point cut power, commence flare, pulling back on the column as the speed reduces
- At inches off the runway the stall warning should sound, and you will touch down like butter!
Well that is the theory…
The reality was almost that, but we had some added fun of Pukeko’s (a native NZ bird) deciding that the touchdown point on the runway was the ideal place for a picnic. The aircraft just ahead of us reported it and I suspect they hit one.
We acknowledged the birds, landed safely and managed to miss them all. However my left brake had no pressure so my FI took control and steered us safely down to the end runway to exit at A1.
We taxied back to the aero club with my FI running the brakes and myself doing the steering.
Once back at the aero club we checked out the left wheel and discovered brake fluid leaking out. Never saw this during pre-flight
Well what a training flight that was! It had almost everything.
Happy days!
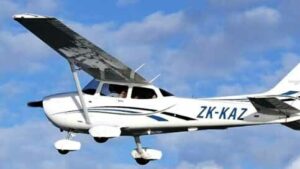
Aircraft: ZK-KAZ (Cessna 172SP Skyhawk)
Total Time: 1.3
Landings: 1
Go-arounds: 0
Visual Approaches: 3
Terrain Awareness: 0.9
Until next time….
For more Blogs and Digital Photos go to https://walshephotography.com
Check out Kapiti Aero Club at https://www.kapitiaeroclub.co.nz
Blog – Terrain Awareness (3) 09/04/2022